


Al Heeley
-
Posts
1,806 -
Joined
-
Last visited
Content Type
Profiles
Forums
Events
Shop
Articles
Everything posted by Al Heeley
-
[quote name='Lfalex v1.1' post='387449' date='Jan 21 2009, 01:07 PM']But if you made it, don't you [i]know[/i] what the controls do? [/quote]Heh, thats a dangerous assumption!
-
[quote name='umph' post='387355' date='Jan 21 2009, 12:00 PM']paint it on then apply enamel[/quote]Err, how exactly do I go about applying enamel? The golden rule is: Is it something likely to stress out the wife if I do it in the kitchen? Toasted: It's for my mark II A/B/Y box, also for better truss rod cover lettering for the Lemonbacker. I think the 'bake in oven' step is divorce-territory. Brother labelling machine - wife has a Dymo one I'm allowed to use, its ok but it looks lame. Will explore the vinyl lettering + acrylic craft varnish spray route as the most feasible.
-
Acid etch sounds inpractical for me - I need a screen, acid, etch resist (tranfers?) Vinyl letters - interesting, but on-line sites concentrate on shop signage, big letters, expensive one-offs, how well will they stick to a die-cast metal box? How much wear and tear can they take from being trodden on or bounced around in a gig bag? Special ink-jet decal paper - used before. Needs a good coat of lacquer to seal afterwards in order to protect from wear and tear. Not always good adhesion to metal. What about Letraset type letters + varnish overspray? Be interested to hear more about this baking of the letters to fix them to the metal case. What sort of computer printout could be baked on to metal? Sharpie? Last resort for that home-made vibe.
-
Quick question: What's the best way to get permanent lettering onto a die-cast enclosure for a home-made stomp box? I want something that looks reasonably professional and won't wear off after a couple of months in a gig bag.
-
Not sure what this has to do with Titanium Dioxide in paints - this pigment has very little to do with any metal-like characteristics, its not llike Titanium is going to oxidise to TiO2, TiO2 takes a huge amount of energy to process from the raw ore ilmenite, Ti on its own is very stable. I think the cred for tone improvement is pants, to be honest. At one end of the scale: Brass nuts for added tone and sustain. Very soft metal. At the other end: titanium for erm, added tone and sustain. Hmm. the winner: a well-cut nut made from any reasonably solid and durable material. The holistics: a good instrument put together well from decent materials and set up nicely adds the best tone and sustain.
-
Most of my basses cost a lot less than these
Al Heeley replied to Happy Jack's topic in eBay - Weird and Wonderful
!!!good grief!!!That is plain ridiculous -
quick preview of my almost finished omni 15
Al Heeley replied to SkinnyMike's topic in Build Diaries
I'm intrigued - not seen anything like that before. Educate me oh master -
+1 for sennheisers, I have a few diffferent pairs but nothing 'top-end', event he budget end of the range are great sound quality and very comfortable to wear.
-
Beautiful! I love the look of oiled wenge, its stunning, but I hate working with it as I get my fingers full of splinters. Lovely work! Classy, not over-flash but very tasteful pieces of wood.
-
Progress has slowed a little. Hopefully my mate will bring in his band saw to lend me tomorrow, then i can get the neck profile cut out and start on the neck shaping. Meanwhile there's the fingerboard to finish slotting, radiussing and sanding level. Here's the binding on the body
-
Here's a schematic for an A/B/Y box with pretty LED's I am ordering some more LEDS and 3PDT footswitches to put one of these together as my next stompbox project. (Note: Obviously still a passive box, battery is just used to power the LED indicators.) ***If it looks like some of the wires are missing you have to click on the pic to get full size, the lines are only 1 px wide***
-
why is it so important you don't use an instrument cable to connect a speaker cab to an amp head?
-
[url="http://www.maplin.co.uk/Module.aspx?ModuleNo=982"]http://www.maplin.co.uk/Module.aspx?ModuleNo=982[/url] I've used these maplin types on a couple of stompbox homebuilds recently - either this type or the open type are fine for you.
-
Here's a little pic from StewMac's site: This is the basis for a passive blend, but you would need a blend pot with true linear taper. I have not managed to find one yet that blends properly to make it work well enough.
-
Ah, interesting Q, I had a big thread on Talkbass and Guitar Nutz going about blend pots last year, trying to find a true blend pot for a passive bass ctrl, and I found all the ones sold in the various guitar parts outlets were not really true blend pots due to differences in the taper of the two pot tracks. This had the effect of reducing the volume significantly at the centre detent position due to bot tracks not being balanced taper. in the end I went back to a standard jazz-bass type with 2 separate vol pots - the change in overall volume throughout the blend pot sweep was a real pain. you ended up having to tweak the volume every time you reset the blend. I understand with active systems you can get a more accurate track taper so the blend function becomes good enough to be of practical use. I think these tend to be 50k pots. So it would be pretty easy to make a simple a/b blender, but to make a really good and useful one may be quite tricky.
-
SOLD: Marshall 6101 30th anniversary + extn cab
Al Heeley replied to Al Heeley's topic in Amps and Cabs For Sale
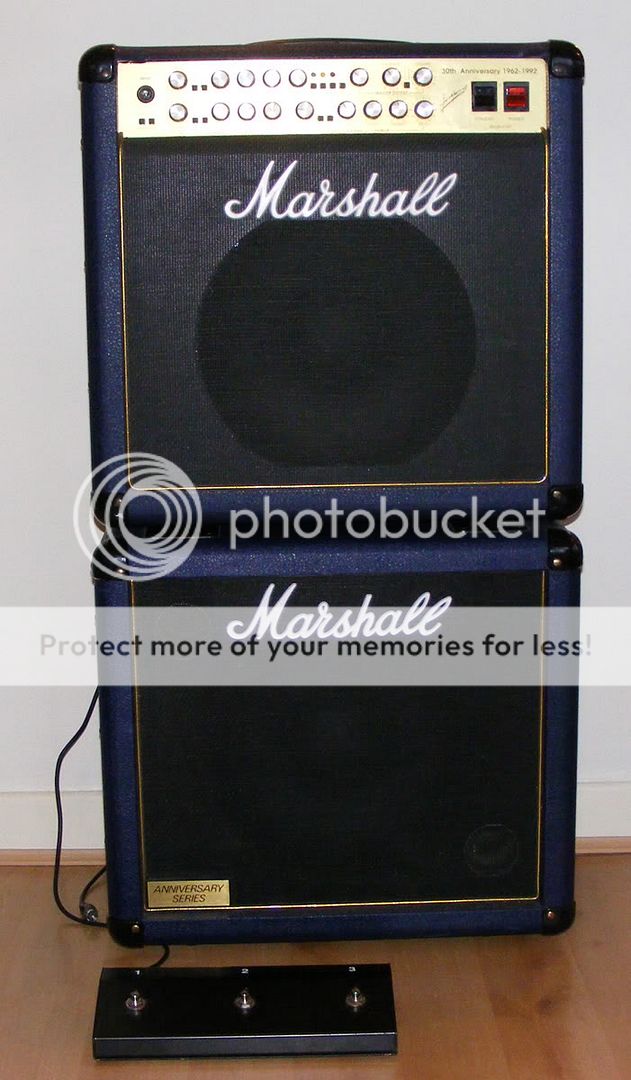 The time is due for a little bump
 -
[quote]What enclosure did you use?[/quote] Not pretty but works, its a simple Maplins die-cast metal enclosure. [quote]You can probably buy a Beringher one for less than you spent on bits[/quote] sort of misses the point of (a) having all the bits anyway, and ( the enjoyment of figuring one out and putting it together yourself. I built a really great sounding Ibanez Tube Screamer clone from scratch, in the end it cost me a lot of time and components but if I wanted to just go and buy a ready made one I'd go onto ebay and learn nothing about how they work, how to put them together, etc. etc.. I think the 2 LED's is a good next step, one of the jacks is stereo so I can use that as a power-on and fit a couple of LEDs to it to show the switch status.
-
Fretboard WIP - nice piece of stripey rosewood from David Dyke. Brass/wood plug inserts need sanding flush. then its fret slot cutting time. Oh joy.
-
Oooh! The Wenge - beware the lure of the Wenge! Theres some gorgeous big railway sleepers of Wenge in the warehouse near the wood floor section. Serious money but mouthwateringly wengey.
-
Thanks Mikey, if Boddy's warehouse wasn't so darned cold I could spend all afternoon rummaging round in their wood bins. The maple cap is 15mm and the walnut is 25mm. Most of the stuff is 25mm but there are some wides sheets that are 15mm if you look in the shelf areas. Yep, I've got some planing to do but I'll probably leave the body a little thicker than the original - makes for less nervous pickup and ctrl routing. Still got 5mm to lose but thats what electric planers are for. The beams for the neck section are all 20mm thick, they come from the bin end sections at the end of the rows.
-
Here's the two body wings cut to final size and sanded. Next the edge channel will be routed for the binding.
-
More work on the body wings. Cut to final shape and sanded smooth, ready for roting the channel for the binding. Maple and walnut go nicely together. Here's the top edge.
-
I guess its the only way to guarantee someone won't try to put the wrong voltage/polarity/current into their stompbox. I prefer to use the multi ones you can get in maplins with a load of different sized plugs and phase reversal if you need it, much more flexible for powering a multitude of different appliances
-
This would make me very nervous - you cannot be certain of the depth of the truss rod channel rout. If you take a little too much off and break thru then that's the neck ruined. I guess one way of seeing if a neck has a lot of spare wood in it is the overall stiffness or sensitivity to small adjustments of truss rod tension, but again if you take a little too much off then its stability will be ruined.
-
Sadly not mine but a friends brought to me for a new nut, recondition and setup