


rwillett
-
Posts
2,134 -
Joined
-
Last visited
-
Days Won
7
Content Type
Profiles
Forums
Events
Shop
Articles
Everything posted by rwillett
-
Harley Benton Deluxe Active Tobacco Sunburst - £80 ONO - *SOLD*
rwillett replied to rwillett's topic in Basses For Sale
 Fixed
Fixed -
Harley Benton Deluxe Active Tobacco Sunburst - £80 ONO - *SOLD*
rwillett replied to rwillett's topic in Basses For Sale
Both sound great. We're coming down to stay with friends in Deptford in a few weeks. We used to live in Greenwich and kids went to school in Deptford before we moved ooop t'North. More than happy to bring them both down for you. Clearly don't want to encourage bad behaviour from you -
Harley Benton Deluxe Active Tobacco Sunburst - £80 ONO - *SOLD*
rwillett replied to rwillett's topic in Basses For Sale
I can encrypt it using that exceptionally difficult system ROT13 if it helps you. -
This is a very nice, modular pine shelving system. We brought it go around an corner in our attic room but is no longer needed. Its very, very sturdy and has any number of different ways it can be put together. There are various heights, various lengths and various widths of shelves. Surprisingly it has all the bits apart from whatever screws you need to attach it to the wall. The wire bits hold the shelves up, which is so much better than a little button. We had it with heavy books on it and it's as straight as the day it came to us. From memory it cost aground £5-600 for all the bits as they a massive step up in quality from IKEA Collection from near Settle in North Yorkshire. Free to anybody who wants them, they will probably fit in a medium sized estate/saloon. Needs to go quickly though Thanks Rob Now gone.
-
- 2
-

-
Basically does anything look right on this?
-
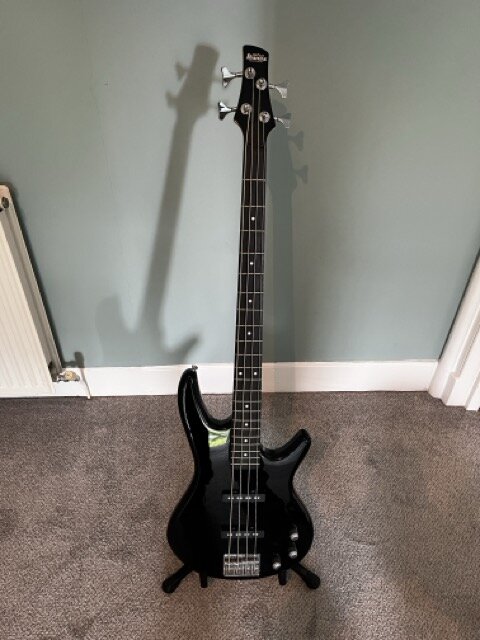
Now sold The CFO and I have just come out of a bilateral meeting where a number of topics of mutual interest were discussed. Theses topics included: Balance of payments Import / export regime Tariffs Apparently I have imported quite a few basses and guitars into the house and the number of basses and guitars exported has hit an all time low of zero. This apparently means I am running a significant deficit. Due to this deficit the CFO is looking at imposing tariffs of circa 125%, such that a £500 bass attracts a tariff of £640 payable to the treasury, aka her bank account. She presented a number of options that I apparently have agreed to. Not saying anything anything as it could be taken the wrong way, clearly indicated my consent. She backed this up with leverage of me sleeping in the attic or the spare bedroom, my choice. I have no idea where she got these ideas from, but she has been paying a lot more attention to US news recently. I explained to her basic economic theory re balance of payments and who really pays tariffs, but I only received a stern look in return. This is the Harley Benton Deluxe Series active bass. This is a lovely bass but the neck and I don't get on. My thumbs are knackered from rugby and it's slightly too thick and it's painful after 15 mins. I brought it from a fellow bass chatter a few months ago but I have to recognise I need thin necks. So I've built myself an active Jazz with a Fender neck and a John East pre-amp to take it's place. Again it's a great bass and my thumbs do not do it justice. It's in good nick and as with all Harley Benton stuff its great value for money. I paid £95 but will take £80 for it. There is no case per se for it. The pictures make the neck look grubby , thats just the grain. I'd really, really, really rather not post as the postage costs will be high for what are cheap bass guitars. I am happy to meet people within an hour (ish) of Settle in North Yorkshire, I can Leeds or Manchester if necessary during the week as I work there. York is also possible. More than happy to look at swaps or trades. With cash either way, I'm looking for a decent small 6,8 or 10 channel mixer with USB in and out, or a decent FRFR speaker such as Headrush 112, a Boss Katana 100 MK2 combo amp or similar. Or something else that's interesting. I have enough guitars and basses (according to the CFO), so unless it's a 62 Precision or a Strat, that’s not going to fly. I have more IT than I need so nothing on the IT side at all please Thanks for looking Rob
-
 Paging @neepheid
 -
Trace Elliot tuning port rings? (Or anything that'll fit!)
rwillett replied to TRBboy's topic in Amps and Cabs
Even though this is a year old and you are still looking for them, drop me a line with accurate dimensions and and I'll print some for free Rob- 19 replies
-
- 2
-
-
- trace elliot
- tuning port
- (and 2 more)
-
When you have had a petition raised against you that calls you out specifically by name, there's bugger all that you can call me that will offend me. For the avoidance of doubt, this was about me taking over all the IT and networking at Central St Martins as well as the other four colleges that make up the University of Arts for London and dragging them kicking and screaming into the 20th century. This was 97 or 98. Things like email, networks faster than 64kb, new hr system etc etc. I'd insisted that we weren't going to wait five years but it was going to be done in six months. A few studios and their shop got closed for a while. Apparently I was despised as I wasn't an artist but a mere technician. They were right but I did it. There may well have been a protest meeting. I've had people trying to sack me on more than one occasion. I've had people talking about "that Rob Willett" not realised I.was in the meeting (DWP and DCS), that was a fun one and elicited a response and apology afterwards. I've has people screaming at me that I didn't understand Agile. That bloke went off long term with a nervous breakdown. I've been acussed of racism when I caught a burglar doing my flat over in Brixton. That's one of the few times in my life I've actually lost my temper as I'm not. I'm still here, still fully employed with more work than I can handle it. toy-bass fetishist is a bit weak. Come on try harder.
-
Been called a lot worse...
-
Add me down. I'm @neepheid gofer Westone Thunder bass Westone Thunder guitar 3d printed headless bass 3d printed guitar Fender Jazz MIJ 97 Fender Jazz bitsa active Fender Strat MIJ 87 Fender Mustang bass Ibanez Mikro bass I have some interesting ideas for my next 3d printed bass but that's dependent on pulling finger out. I might acquire some small amps before then or I might not. Yes I swing both ways and play guitar and bass. I've no pride whatsoever.
-
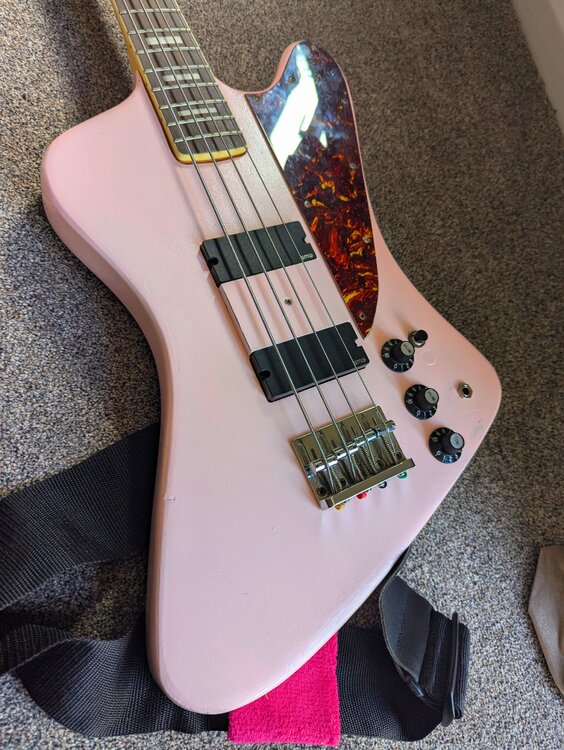
Nope. Just brought a nice natural finish Westone Thunder 1 bass (non active) to match my Westone Thunder guitar. Been looking for one for some time and got it from this very parish. Just built a lovely black jazz with a lovely old neck, lightweight gotoh tuners, hi mass bridge, luthier body, bare knuckle pickups and a John East preamp. That's a very, very nice bass with a great sound. Which means I now have to sell a very nice and very light Ibanez bass and an active and a very nice active Harley Benton bass to get the various instruments down to 14 which appears to be t'other half's imposed limit. I quite fancy a Sunn but am thinking about my next 3d printed bass. I have some interesting ideas for the build and I'm going to see if I can get it done for the SW Bass Bash.
-
Now reduced by 42% 😊
-
Well if you see a cheap non-white one, put a link on here please 😊 The last time I looked they were circa £100-£150.
-
I don't know much about them but that seems expensive. Is it?
-
 Has the neck gone? I have more pickups than I will ever need 😊 Thanks Rob
 -
I had a play on a Vox Starstream at the NW Bass Bash last year. Great bass. Hope you being it to the SW bash
-
Oh oh cocked that one up already
-
Bring passport and keg of cider. I'm coming from the North West though. Not sure how I'll fit in. I'll probably have to get a smock and and practise my drawl 😊
-
Has anyone actually ordered a Fender Mod Shop instrument?
rwillett replied to HeadlessBassist's topic in Bass Guitars
58th time lucky? -
I'm now slimming the herd down. I've brought a Westone Thunder bass to match my Westone guitar, I've built a Geddy Lee Jazz bitsa and think some of them basses need to go. I also want/need a guitar amp and not sure whether to get a Headrush 112 with a Tonex/Mod Dwarf or a Boss Katana. Decisions, decisions, decisions....
-
I am.
-
Just spoken to my diary secretary/CEO/partner in crime and she's OK with me going AWOL for the weekend. So am planning to come down now. The only hassle is coming back as I probably have to go to work on Monday. @neepheid we probably need to discuss how to break the space-time continuum and work how to get everything into your car or we simply take my larger estate 😊 I'll probably bring 3d printed headless bass 3d printed six string Westone Thunder Bass and matching Westone Thunder six string Probably one or two others. I'll bring a couple of pedalboards as well. If people are interested in a custom made pedal board, absolutely made to measure for sensible donations to charity, let me know. Also if we are looking to do 'work' I'm happy to run a software and hardware IT clinic. If people have issues let me know in advance so I can see if I can help. Rob
-
Doesn't look that bad, to be fair what he says is actually 100% correct. It has one pickup, that is similar to old fenders and lots of other guitars and he says it not likely to be a Fender. Again that is 100% correct. "No branding but has just one pick up similar to old fenders but not likely to be." At £52.47 its not bad value. However it looks like it's 3/4 size or is that just the perspective. I note that you could probably slip another guitar under the strings as well. Rob
-
I've had that mentioned to me many times before. Well actually, only once or twice, and it might actually be just once, now I think about it.


